
The new project called ‘Rich sensors’. As a rich sensor, I can control my work using the PlayStation or Xbox controller, Nintendo Wi-Remote, smartphone lights, gyroscope, microphone, etc., away from the mouse or keyboard input I used previously.
The first day of the project workshop is simply. We learned how to turn processing into Android SDK mode and build an Android phone or tablet with the app. We installed the processing library, downloaded the Android SDK, activated the license and finished the basic settings for the work.


Building a processing sketch on Android was simple. If I change Java to Android on the top right and run, it is automatically installed on the smartphone. For further testing, I downloaded the ‘Ketai’ library. The library was designed help to get sensor information from your devices, such as gyroscopes, light, microphone input, accelerometer, etc. And for Android, I learned how to set permissions for application like as camera and microphone.
First day of project, we ended up experimenting with a few examples to see our Android devices works well with processing sketch. Tomorrow, we will see called ‘OSCulator(available only for MacOS)” and more advanced sensors operations.


On the second day, we tried to bring the sensor information of the Android devices wirelessly using the network. “OSC (Open Sound Control)” was used. By connecting the Android devices and the computer to the same network and setting the same IP address on the OUTPUT side, it was possible to synchronize various sensor information. Based on this, many people could access the same work and control the work at the same time.
The example that I used today is try to use the Android device gyroscope information to move the clock displayed on the computer screen. However, in my case, the sketch itself did not run because of the OpenGL problem, so I will try that again.
On Friday, there was a workshop for Arduino WiFi module. It was how to remotely control a computer using a Arduino WiFi module. We had to get a WiFi driver before class. However, I did not know that I need to download additional file on the Arduino Additional Boards Manager URLs. So, class started was delayed little bit. (Sorry!)


The point of today’s lecture was that we could connect multiple devices to the same IP address of the Wi-Fi and control the work of others. In addition, we learned how to use an electric motor(?) in control with WiFi module and Android devices. According to the inclination or touch input of the Android device, the x and y axes of the electric motor can be changed.


The biggest mistake we made during this week’s session is that devices should be connected to the same network, and Windows machine may block OSC connections due to firewall issues. This is solved by turning off the firewall temporarily. If you use AVAST or other antivirus, you need to replace the “Network Profile” setting on the app with “Public” -> “Personal”.

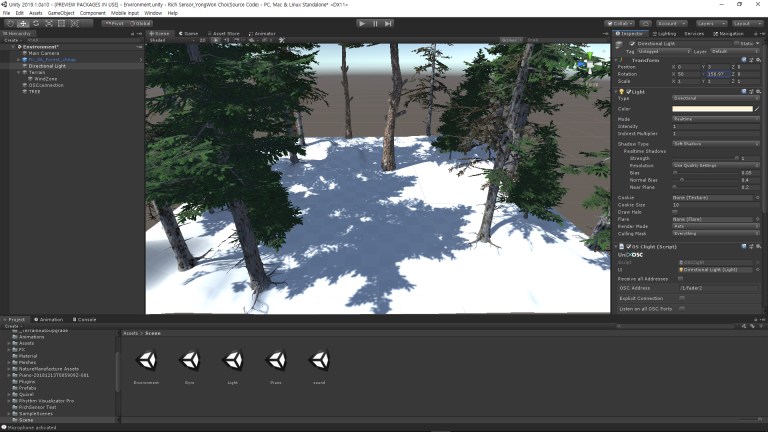
On Monday, there was an OSC workshop using Unity. I was concentrating on this session because I was going to do this work using Unity. In case of Unity, I bought UNIOSC from the asset store to use OSC.
This session was how to control the Unity internal scene wirelessly using TouchOSC on a Android or IOS devices and UniOSC on Unity.
First, I need to put the UniOSC component into the empty game object and make the default settings. Input IP address and port address, etc … As for connecting OSC, input the IP address of the receiving side to the output device and input the port number like the last week’s session. And when connecting Unity with TouchOSC, I need to synchronize both of IP address.
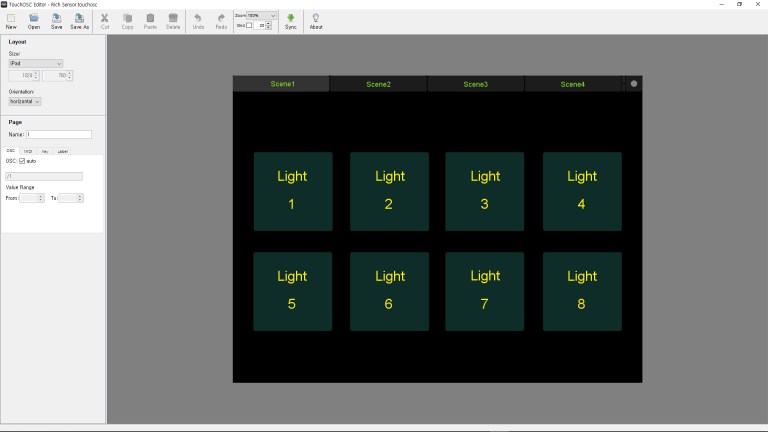
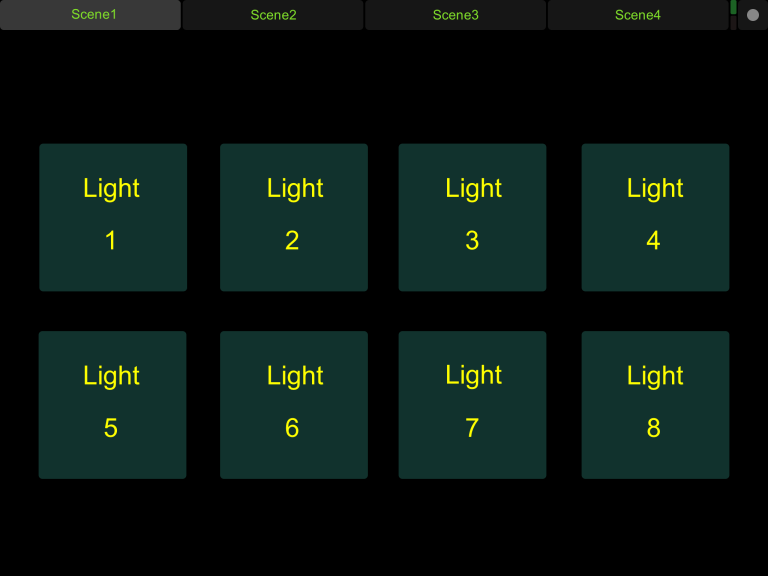
In the case of TouchOSC, it is necessary to input the controller number, the button to be input or the name of the slider – correctly in the ‘Address’ item, since various controllers can be sequentially inserted in one screen. (You can put various controllers on one screen as shown in the picture below.)


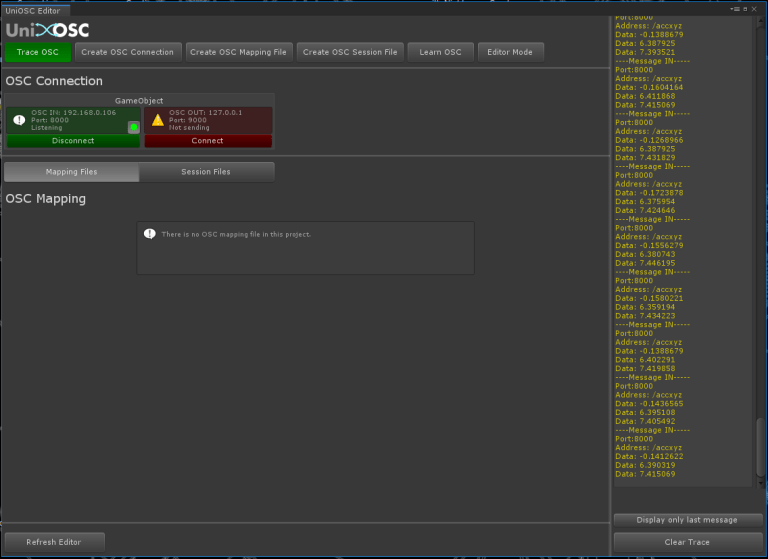

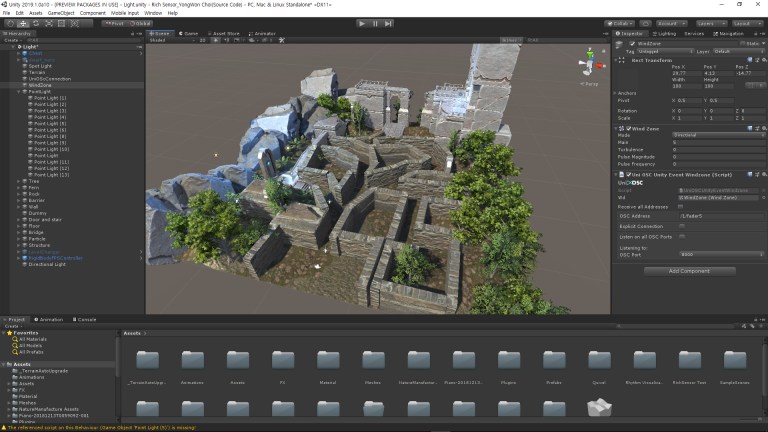
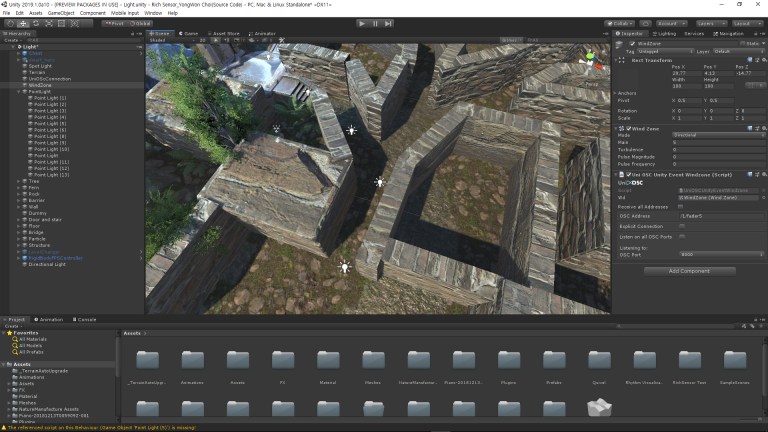
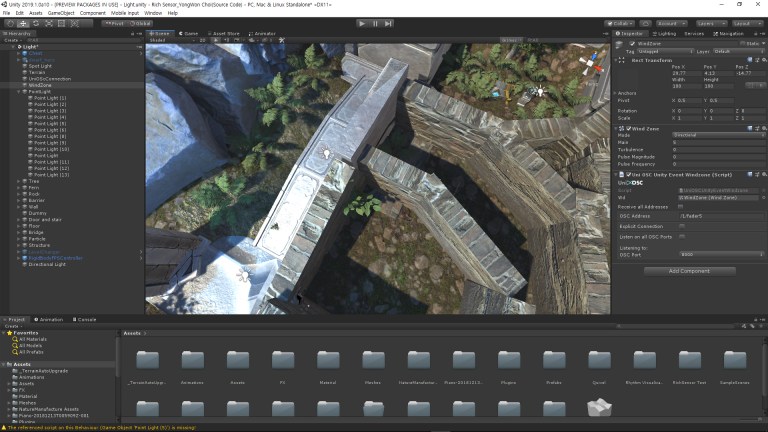
An we can modify the source code to control objects within the Unity project. Light, wind zone, object size, location and so on.
On Tuesday, we were working with various input tools. The workshop used the Nintendo Wii controller, footsteps and PS3 controller Xbox controller.
I also learned to control the processing sketches using the accelerometer(?) value of the Nintendo Wii controller and control x,y position using Nintendo foot pressure sensor. Today session was nice to learned how to use various sensors.


All the workshops were finished, we only have tutorials and studio supports remained. In the first tutorial, I talked for about 20 minutes for my work about two weeks.
What my idea is I try to create a game to find treasure with the TouchOSC acceleration function and touch input. Because with the TouchOSC’s sliders, I can control the natural environment, such as Windzone or Directional Light inside the unity. Even player.
For the tutorial, I prepared making a preview of game map and character. On the map there were torch and various natural objects. And make them can control using TouchOSC. Such as turn off or turn on the torch and control sunlight.
And temporally, in the tutorial I moved the character with the PS4 controller. Because, original plan was control player using accelerometer, but the code is not working yet.
Moreover, Windows users could not use OSculator, so I moved the PS4 controller with a separate program. The programme name is “DS4Windows”.

However, tutor said, it is fun to implement this task in Unity, but this project does not create games, my job is controls multi-sensors input, so I need to remind basic goal of the project. Following the tutorial, I was back to beginning and think about what I missed.
In fact, after tutorial still I did not imagine what I need to make exactly. After careful consideration, I achieved to do the task in the direction of making various prototypes that will receive various sensor input values according to the tutorial feedback.
Because Unity allows to configure various scenes in a single project and set up the object’s triggers, it is easy to cross between scenes.
So, during the remainder of the time, I fixed the game project we worked on last week. I tried to create something that would find the door to the next stage with TouchOSC input values.
The first scene, allows you to control the light every time when you touch, creating a concept work that illuminates the path to the door.
The second scene, you will control ball can move to the next scene point using gyroscope.
Scene 1

First, in the case of the existing game scene, I moved the character to the PS4 DualShock and made the control of the torch with the TouchOSC. However, it was inconvenient to control the TouchOSC and dual-shock on the one hand. So, I decided to unified input method.
Using the Accelerometer function of the TouchOSC, it was able to get data values in the X, Y, and Z axes. The idea was to map that value to the Unity character’s position. And the touch input (button) on the Android device display is only to turn on and off the light that illuminates the user’s movement path. Like as online games quest guide. When the touch input is received, the light is turned on to let the player know where to go to the next point.
Light turn on and turn off operations were very easy to implement but creating the code for mapping the character’s position with Android device accelerometer would cause a compile error. If I can finish this project day before assessment, I decide to spend more time to fix that code.
Scene 2

The second scene was made by modifying the code created by mapping the UniOSC’s rotation function with the gyroscope in the second week session. The idea was simple: move the ball to the designated position safely by moving the maze plane mapped with the gyroscope. At first, I was trying to move the ball using gyroscope, but I immediately realized that I had remembered to fail working with the player object moving to gyroscope.
Scene 3
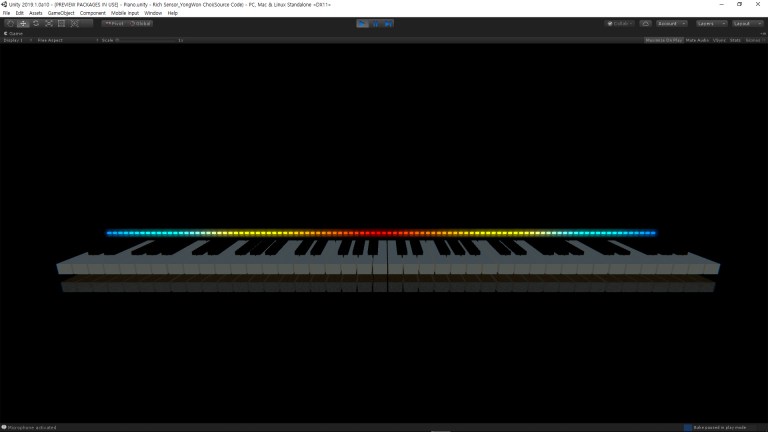
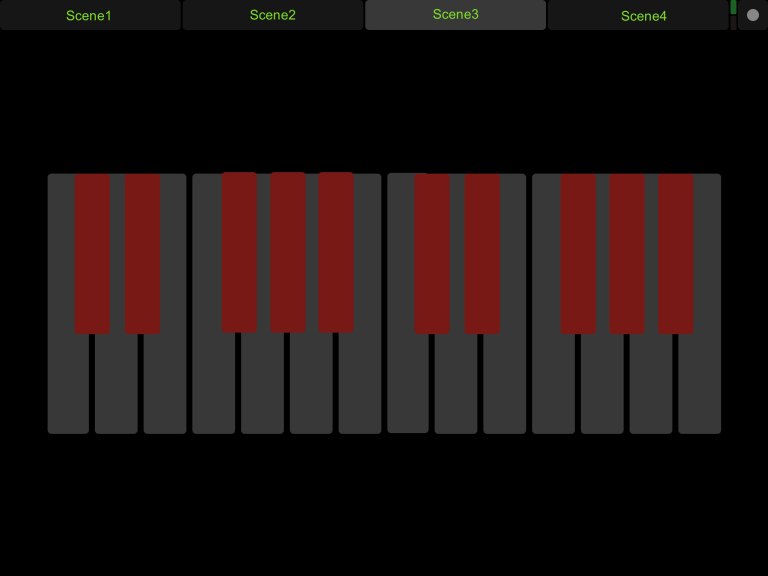
From the third scene, I was thinking about working with the original function of TouchOSC that is sound mixing. And I looked around TouchOSC layouts, found the piano interface, and try to create a virtual piano.

Production was much simpler than I thought. I created the cube as a piano, then used the UnityEventRelay function to make it sound played when unity received the touch input.
However, making only piano on the scene is given empty feeling. So in the background, I made sound visualization using microphone-input, and it make a sound bar moved. This asset from Unity asset store.


There was a slight problem with the microphone control when creating the sound visualization. My laptop has a built-in stereo microphone, so there was a noise issue due to sensitivity problems.
I tried various things and found a solution is changed the format from stereo 16bit 44.1khz to 32bit 192khz in Windows configuration.
On the last day, SoundFree.org attempted to map and receive additional sound files from C3 to B3 and C5 to B5, but it was not connected to the bad gateway error from 10pm to 5am. I will map and submit it again before submitting the final project.
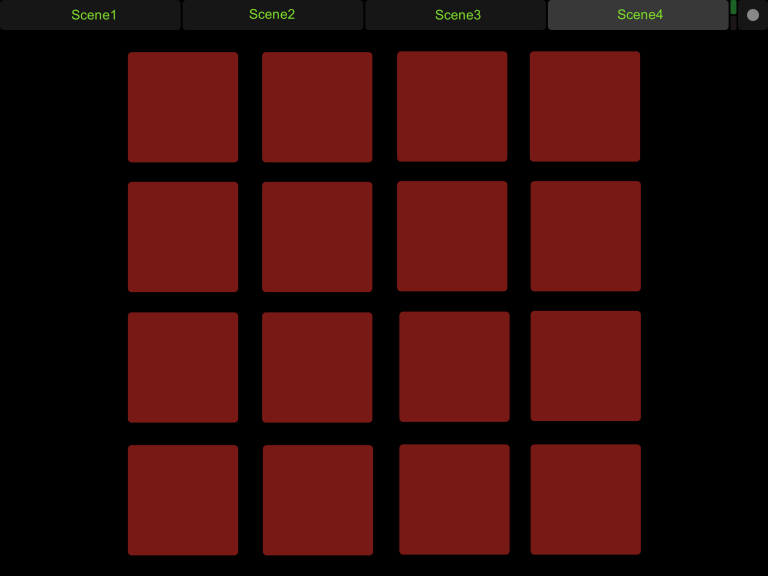
Scene 4
The idea was to implement the position of the orchestra’s instrument on the TouchOSC, and when the button was pressed the individual instrument would be played together. However, I could not find any piece of orchestra music by each instrument.
And I was able to find out whether it was possible to artificially separate orchestra instruments from inside the music file, but there was only a result of university research that it was possible using machine learning. Due to unavoidable reason, there was a modification of the idea.

The modified idea was rhythm game production using touch buttons. TouchOSC was originally designed for audio control, and the interface that can be produced through the editor was like the rhythm game in the early days of Android or the rhythm game(JUBEAT) in the game room.

However, after searching Google for Unity Rhythm game creation, I found only a small number of search results. It would be difficult to implement within a given project time by following. Alternatively, when it receive the touch input, I try to make a very simple task that outputs the sound.
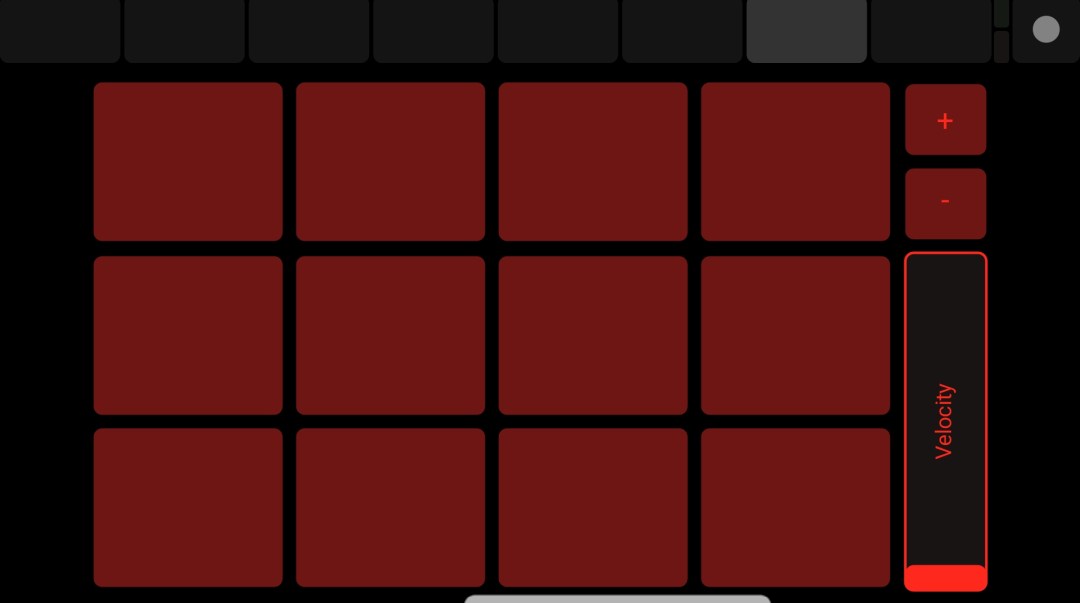
This work is working by using Play () and Stop () functions of UnityEventRelay. A total of 16 cubes with 4 * 4 arrays are inserted in the first and third columns, and the second and fourth columns have the function of stopping the reproduction of the first and third rows.
A simple intention was to find out what sounds were mapped internally by the user. I originally tried to make a random mix of play and stop buttons, but I did not make it random because it was hard to turn off the sound.
Scene 5
The fifth scene was created to show the natural environment control we worked on in the first scene more clearly. Terrine was created, and on top of it, Windzone and lights were mapped to TouchOSC. The reason why I separate two scenes in one project is the map covered with the maze wall and Windzone is not visible clearly.
And to make the light look clearly, it’s hard to observe the lights and trees shaking because the background is a solid color rather than a Skybox. So, I wanted to show that I could adjust the natural environment with a slider, so I made an additional scene.
I originally wanted to control the y-axis rather than the intensity of the orientation light. This is because the y-axis changes the position of the shadow when the angle changes like the sun. But, that is not working my expected. I will try to fix that again if I have an enough time before Summative assessment.


And finally, I created the controller to control each scene. It could be edited by the TouchOSC editor. You can download on the TouchOSC website.

The presentation proceeded in the studio. It was the last day of first semester so the atmosphere was comfort, and some people did not attended. For that reason the time for presentation per person has become a little longer. Other friends work mainly using Nintendo Wii controllers. Everyone working with Processing or Unity.
I saw the works of my friend who did presentation earlier than me, I can find there were a few things that overlapped with the works of my friends. Two of the five scenes I created were like those of my other friends. Of course, the result is a little different form.
In the presentation, I tried to give a controller to a tutor or a random person to experience my work, but I just proceeded presentation from beginning to end myself. This is an obvious mistake.
Why I start to use Unity as a main is in the 4th year, I decided to use Unity as my main project material, and I needed a more advanced level of ability to use the program. Through this project I can learned a lot of things for unity. I think this is good start. And in this part, the evaluation of the tutor was good.
In addition, there was one requirement of the tutor. During the presentation, some people interested in the Material pack I used. Because it has very high resolution. So, I gave them a site selling photo scans of real objects called “Quixel Megascan”.
Normally, I made the most of my projects using Unity, so if I have any useful programs or information related with Unity, I will share that on the Interaction Design Facebook.
Thank you 🙂
+ Sketch books and idea notes will be update after 15 Jan…
